Let’s talk cookies. Not just any cookies. We’re talking about Tagalong Cookies – those magical little rounds that unite crispy shortbread, creamy peanut butter, and silky chocolate into one bite of pure bliss. If you’ve ever found yourself hoarding boxes of these during Girl Scout season, friend, you’re not alone. But here’s the thing: you don’t have to wait for once-a-year delivery. You can make them from scratch, right at home. Anytime. Anywhere. (Dangerous knowledge, I know.)
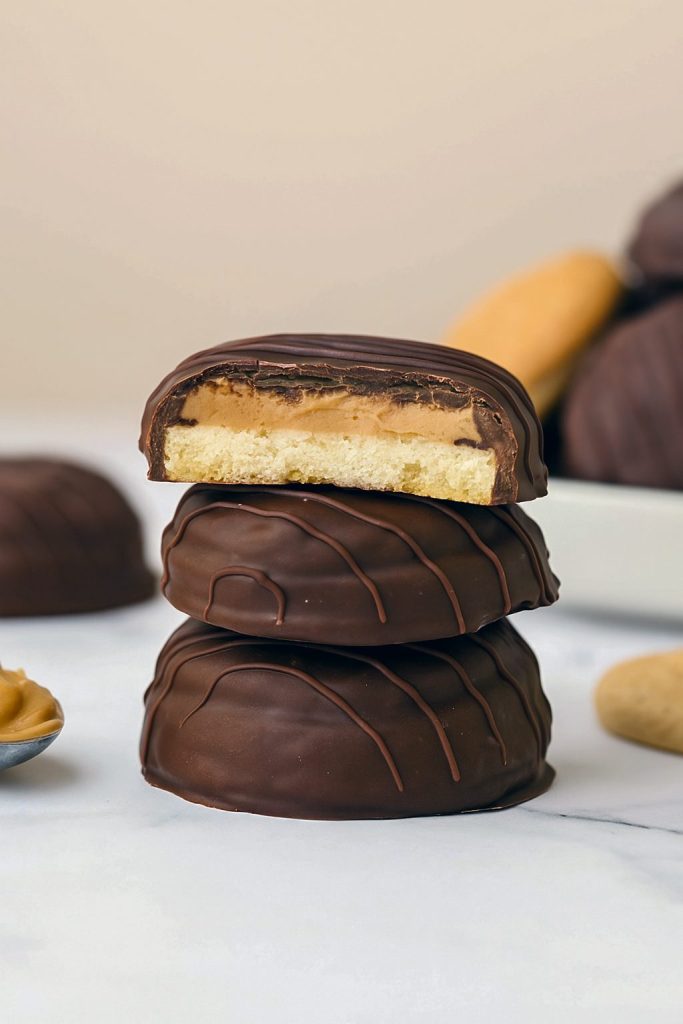
These homemade Tagalong Cookies are the real deal: a buttery cookie base, a luscious peanut butter filling, and that signature chocolate coating. The result? A copycat cookie that’s arguably better than the original. Why? Because you can pile on as much peanut butter cookie filling as your heart desires. And trust me, you’ll want to.
I was a Girl Scout for years (yes, I still remember all the songs), and while I proudly sold every box I could, I was also busy stashing a few sleeves away for myself. Of all the Girl Scout cookie types, Tagalongs always ranked top-tier for me. Sure, Thin Mints have their loyal fan base (respect), but when it comes to peanut butter filled chocolate cookies, Tagalongs reign supreme.
Let’s break it down:
These cookies do have a few steps, but don’t be intimidated. Each layer builds flavor and texture, and the process is actually pretty fun. Think of it as a baking project that ends in a ridiculously delicious reward.
Start with the baking sweets basics: mix up that buttery shortbread dough, chill it, slice it, and bake until golden perfection. Then comes the magic: that dreamy peanut butter filling. It’s salty, sweet, and smooth. Like, eat-it-with-a-spoon kind of good. (Not that I did that. Okay, maybe I did. Once.)
Pro tip: Skip the natural peanut butter here. You want that creamy, processed perfection that holds its shape and stays smooth when piped. Something like Jif or Skippy will do the trick.
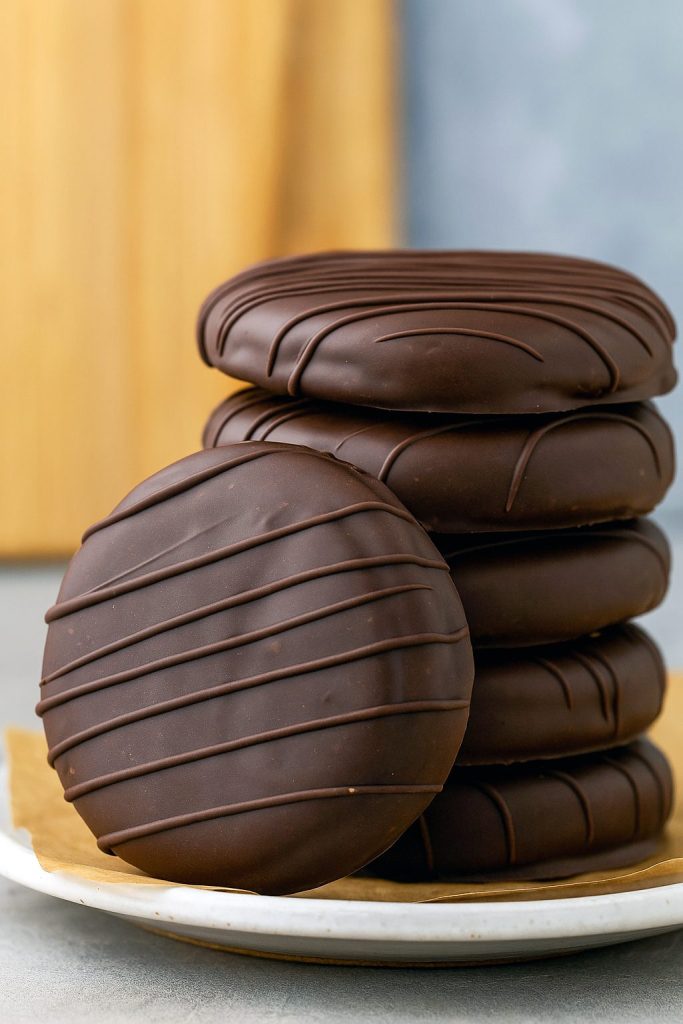
Next, we melt some chocolate (use Ghirardelli wafers or almond bark for the smoothest finish) and dip each cookie to coat it completely. Yes, your fingers will get a little chocolatey. No, you won’t care. It’s all part of the joy.
Want to know how to make peanut butter filled cookies that look bakery-perfect? Chill the cookies after you add the filling. That way, when you go in for the chocolate dunk, the peanut butter holds firm. It makes a difference.
Once the chocolate sets, what you’re left with is a stack of homemade peanut butter cookies so good they might just disappear by the next morning. (I’m speaking from experience here.)
A few tips to keep your cookies on point:
- Measure your slices evenly so they bake uniformly.
- Don’t overbake! The bottoms should just start to turn golden.
- Dip in small batches. Melt one bag of chocolate at a time to keep it smooth.
And just like that, you’re now the friend who knows how to make peanut butter filled cookies from scratch. You’ll become dangerously popular. Prepare yourself.
Storing the goods: I like to keep them in the fridge so the peanut butter cookie filling stays firm, but they’re totally fine at room temp, too. Just expect a softer bite.
Freezer-friendly? You bet. Once the chocolate sets, pop them in a container with parchment between layers. Thaw in the fridge to avoid sticky situations.
Whether you’re baking for a party, gifting a treat, or just craving some yummy cookies, these homemade Tagalongs hit every sweet spot. They’re nostalgic, decadent, and just plain awesome.
So grab that apron, queue up your favorite playlist, and get baking. Because life’s too short not to make your own Tagalongs.
Who’s ready for a second batch already?
Tagalong Cookies Recipe with Creamy Peanut Butter Filling
- Total Time: 3 hours 12 minutes
- Yield: 34 Cookies
Description
Skip the cookie box and make your own Tagalong-style cookies right at home—these are buttery, crunchy, and loaded with a creamy peanut butter center, all enrobed in silky melted chocolate.
Ingredients
For the Shortbread Cookies:
- 1 cup (226g) unsalted butter, softened
- ⅔ cup (126g) white sugar
- 2 large egg yolks
- 2 teaspoons (10ml) vanilla extract
- 2 ½ cups (350g) all-purpose flour
- ½ teaspoon salt
For the Creamy Peanut Butter Filling:
- 6 tablespoons unsalted butter, softened
- 1 ¼ cups smooth peanut butter (avoid the natural kind)
- 1 ¼ cups powdered sugar (sifted for smoothness)
- 1 teaspoon vanilla extract
For the Chocolate Shell:
- 3 (10 oz) bags Ghirardelli dark chocolate melting wafers, or similar
Instructions
- Make the Cookie Base
- In a stand mixer or large bowl, beat the softened butter with sugar on medium speed until light and creamy.
- Add egg yolks and vanilla; continue mixing until fully incorporated.
- Gradually add in flour and salt. Mix until the dough pulls together into a firm ball.
- Place the dough on parchment paper, divide into two equal logs (about 1.75–2 inches in diameter and 5–6 inches long).
- Wrap tightly in plastic wrap and chill for at least 45 minutes, or until firm.
- Bake the Cookies
- Preheat oven to 350°F. Line baking sheets with parchment or silicone mats.
- Slice each dough log into ¼-inch thick rounds. Gently reshape if needed.
- Place on baking sheet, spaced slightly apart.
- Bake 11–13 minutes, or until edges are golden. Let cool 10 minutes, then transfer to a wire rack to cool completely.
- Make the Peanut Butter Layer
- Beat the softened butter and peanut butter together until creamy and lump-free.
- Add sifted powdered sugar and vanilla, and mix until fluffy.
- Transfer the filling to a piping bag fitted with a wide round tip—or simply snip the end of a zip-top bag.
- Assemble the Cookies
- Line a baking tray with parchment paper or silicone.
- Pipe a swirl of peanut butter filling on top of each cookie, working from the outer edge inward. Smooth the top with a knife or offset spatula.
- Chill cookies in the fridge for 15–30 minutes until the filling firms up.
- Coat in Chocolate
- In a microwave-safe bowl, melt the chocolate wafers at 50% power in 30-second bursts, stirring after each, until smooth. Be careful not to overheat!
- Using a fork, dip the bottom of each cookie into the melted chocolate.
- Hold it above the bowl and use a spoon to pour chocolate over the top until fully coated.
- Tap the fork on the edge of the bowl to shake off excess chocolate.
- Place each cookie back on the tray to set. If there’s extra chocolate, feel free to drizzle some decorative lines across the top.
Notes
📝 Pro Tips
- Slice precisely: Aim for even ¼-inch thick slices using a ruler or guide. This helps cookies bake uniformly.
- Best chocolate for coating: Go for candy melts or almond bark. They melt smooth and set quickly. Regular chocolate chips can be thick and finicky.
- Work in batches: Only melt one bag of chocolate at a time and dip cookies in small groups. Keep the rest chilled until ready to coat.
- Clean as you go: Wipe off your fork and dipping tools occasionally to keep your coating smooth.
🧊 How to Store
- Store cookies in an airtight container in the fridge. They’ll stay nice and firm but still tender when you bite in. Place parchment between layers if stacking.
- Prep Time: 3 hours
- Cook Time: 12 minutes
- Category: Desserts
Nutrition
- Serving Size: 1 Cookie
- Calories: 338 mg
- Sugar: 18.5 g
- Sodium: 78.9 mg
- Fat: 22.3 g
- Carbohydrates: 30.7 g
- Fiber: 2.7 g
- Protein: 4.8 g
- Cholesterol: 32.1 mg