Description
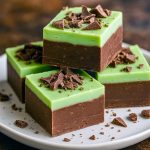
Love that combo of rich chocolate and cool mint? Then this easy no-bake treat is about to become your new obsession. With creamy layers of chocolate and a refreshing minty top, this homemade fudge is both simple to make and seriously hard to resist.
Perfect for holidays, gifting, or snacking straight from the fridge—this one’s a keeper!
Ingredients
Chocolate Bottom Layer
- 2 cups semi-sweet chocolate chips
- 7 oz (½ can) sweetened condensed milk
- 1 tsp vanilla extract
Minty Top Layer
- 2 cups white chocolate chips
- 7 oz (½ can) sweetened condensed milk
- 1 tsp peppermint extract
- 2–3 drops green food coloring (totally optional!)
Optional Toppings: Chocolate curls, crushed mints, sprinkles, or a dusting of cocoa powder
Instructions
- Start with the Chocolate Base
- Add the semi-sweet chocolate chips and half a can of sweetened condensed milk into a saucepan. Warm it slowly over low heat, stirring frequently until smooth and melty. Once combined, stir in the vanilla extract.
- Pour the melted chocolate mixture into an 8×8-inch square pan lined with parchment paper. Spread it out into an even layer, then let it cool for a few minutes so it can begin to set up while you work on the mint layer.
- Create the Minty Top
- In a clean saucepan, melt the white chocolate chips with the remaining condensed milk over low heat, stirring constantly. Once the mixture is silky smooth, stir in the peppermint extract and, if you like, a couple drops of green food coloring for that classic mint look.
- Build the Layers
- Gently pour the minty white chocolate over the chocolate base. Use a spatula to smooth it out evenly across the top. Try not to press too hard—you want distinct layers, not swirls.
- Let It Set
- Pop the pan into the fridge for a couple of hours (2–3 should do it) until the fudge is firm to the touch and ready to slice.
- Slice, Decorate & Enjoy
- Once the fudge has chilled completely, lift it out using the edges of the parchment paper. Slice into squares with a sharp knife. Add any decorative toppings while the top is slightly soft, or press them in just after pouring the mint layer. Serve it up or stash it in the fridge for sweet snacking later!
Notes
Storing Your Fudge
- Keep leftovers in an airtight container in the refrigerator. It’ll stay fresh for up to 2 weeks.
- Want to freeze it? Go for it! Just wrap it tightly and store in the freezer for up to 3 months. Thaw in the fridge before serving.
Tips for Fudge Success
- Let the base cool for a few minutes before adding the mint layer to prevent colors from blending.
- Don’t go mint-crazy—peppermint extract is powerful! Start with a little and taste before adding more.
- Use parchment paper! It makes removal (and cleanup) super easy.
- Chill thoroughly before cutting. If it’s too soft, you’ll end up with messy slices.
- Upgrade your chocolate. Quality chips really do make a difference in flavor.
Make It Your Own
- Skip the food coloring if you prefer a natural look. The flavor is still 100% minty.
- Add crunch! Stir in chopped Andes mints, crushed mint candies, or even cookie bits.
- Going dairy-free? Use plant-based chocolate chips and swap in coconut condensed milk.
Final Thoughts
This cool, creamy chocolate mint fudge is a total crowd-pleaser and ridiculously easy to make. Whether you’re whipping it up for a holiday dessert table, gifting it to a friend, or just need a bite of something sweet and minty—this recipe delivers. Give it a try and have fun putting your own spin on it. Let me know how it turns out—and what fun mix-ins or toppings you used! Happy fudge-making! 💚🍫