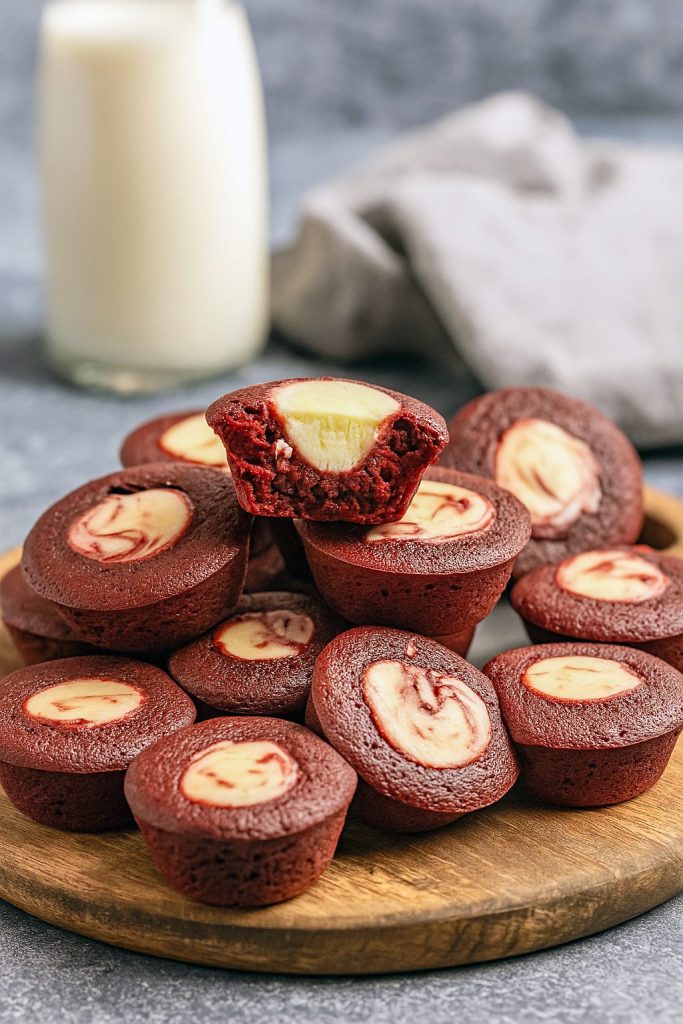
Picture this: you’re hosting a cozy get-together, and instead of hauling out a giant cheesecake or wrestling with a springform pan, you whip up a batch of Mini Red Velvet Cheesecakes. These bite-size marvels pack all the classic cream-cheese richness and that dreamy cocoa-tinted tang of red velvet into perfectly portioned cups. Sound too good? Trust me, these Red Velvet Mini Cheesecake Bites vanish faster than you can say “pass the napkins.”
Why go mini, you ask? First off, no more fretting over water baths or cracked tops—just pop your muffin tin in the oven, and you’re golden in under 20 minutes. Plus, each guest gets their own individual Red Velvet Cheesecake Mini, so no awkward cheesecake slicing or “who got the bigger piece?” drama.
What Makes These Cheesecake Bites Irresistible?
- Moist, Chewy Brownie Base: Unlike ordinary cupcakes, the bottom layer bakes up like a soft brownie, giving every mouthful a rich, chewy encore.
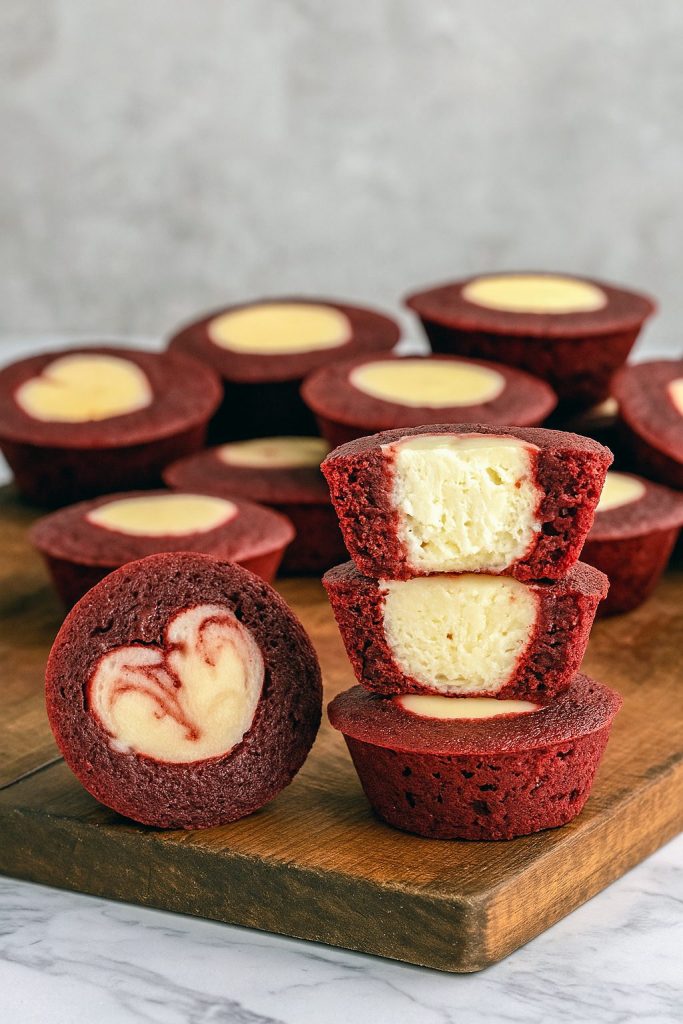
- Silky Cream-Cheese Center: We pipe our Red Velvet Cheesecake Bites With Cream Cheese straight into the middle of the batter so the tangy filling stays silky and smooth. No iceberg-chunk lumps here—just pure velvety bliss.
- Festive Red Color: Got a Valentine’s dinner, holiday party, or just feelin’ fancy? This bright hue screams celebration. FYI, you can nix the food coloring for a more natural look—still delish, just less pizzazz.
Why We’re All Over These Mini Bites
- Quick & Easy: These aren’t some marathon bakeathon. Whisk dry ingredients, stir wet, combine, fill, and bake. Done.
- Few Ingredients, Big Impact: Flour, cocoa, sugar, eggs, butter, cream cheese… that’s it. Your pantry is already stocked.
- Perfectly Portable: Need a grab-and-go treat? These cheesecake cups fit right in lunchboxes, picnic baskets, or your hand while you’re binge-watching your favorite show.
- Versatile: Want chocolate chips? Swirl in some mini chips for an extra hit of cocoa. No red dye? Just omit it—you’ll still get that velvety texture.
IMO, these are the ultimate blend of Baked Dessert Recipes and Baking Sweets—all the charm of a fancy patisserie, zero fuss.
When to Break Out the Mini Red Velvet Cheesecakes
- Date Night Delight: Impress your partner with a “homemade romantic treat” that takes less time than doing the dishes.
- Holiday Hit: Their vivid crimson hue makes them the perfect Vampire Bite Red Velvet Cheesecake for Halloween parties, or a Christmas-themed dessert when dusted with powdered sugar “snow.”
- Any-Occasion Sweet: Birthdays, office potlucks, or just because it’s Tuesday—these are the MVPs of Easy Baking Recipes Desserts.
Pro Tips for Flawless Mini Cheesecakes
- Room-Temp Cream Cheese: Always make sure your cream cheese is softened. That little step keeps your filling silky, not lumpy.
- Grease Your Tin: A quick nonstick spray or butter rub around each cup means effortless removal—no chipped edges here!
- Depression Trick: Use a rounded ½-tsp measure (spritz it with oil first) to create the perfect well for your filling—just press down gently before piping.
- Swirl It Up: Want a marble effect? Drop the cheese mixture in, then swirl with a toothpick for that pro-baker flair.
Bold Tip: Keep an eye on your oven! Minis bake fast—8–9 minutes at 350°F. Pull them at the first sign of set edges to avoid overcooking.
Beyond the Minis: Recipe Remix Ideas
- Bar Form: Feel like sharing? Pour the same batter into a lined baking pan and bake as bars—cheesecake brownies, anyone?
- Chocolate Chip Twist: Stir mini chips into the cream-cheese filling for a double-chocolate punch.
- No-Color Version: Skip the red gel and you’ll still have a decadent cocoa base with a creamy center—same taste, subtler look.
These variations prove that Tasty Baking knows no bounds—feel free to riff and make this recipe yours.
Storage & Make-Ahead Magic
- Refrigerate: Store leftover bites in a sealed container in the fridge for up to 5 days. They stay perfectly moist—just grab one straight from the cold for that signature chilled bite.
- Freeze: Pop them on a tray to flash-freeze, then bag for up to 2 months. Thaw overnight in the fridge, and voilà—instant dessert whenever the craving hits.
Ready to Bake?
So, are you geared up to elevate your dessert lineup with these Mini Red Velvet Cheesecakes? No more giant pans or leftover wedges—just fun, fuss-free bites that deliver all the velvet-and-cheesecake joy in one neat package. Grab your mini muffin tin, crank up the oven, and let’s turn ordinary gatherings into unforgettable moments with these adorable cheesecake bites. Happy baking! 🍰❤️

Mini Red Velvet Cheesecakes – Bite-Size Velvet Cheesecake Bites
- Total Time: 59 minutes
- Yield: 42
Description
These adorable little desserts blend a tender, cocoa-kissed red velvet foundation with a smooth, tangy cheesecake center—no giant springform or water bath required. Perfect for holiday fêtes, Valentine’s Day romance, or a quick after-dinner sweet fix, they bake in under ten minutes and pop right out of a mini muffin tin.
Ingredients
Velvet Cake Base
- 1 cup (125 g) all-purpose flour
- ¼ cup + 1 tbsp (30 g) unsweetened cocoa powder
- ¾ cup (170 g) salted sweet cream butter, melted and cooled
- 1¼ cups (250 g) granulated sugar
- 1 tbsp red gel food coloring (I love Sunny Side Up Bakery’s)
- 2 tsp pure vanilla extract
- 2 large eggs, beaten and at room temperature
Cheesecake Center
- 8 oz (225 g) cream cheese, softened
- ¼ cup (50 g) granulated sugar
- 1 tsp pure vanilla extract
- 1 large egg yolk
Instructions
- Prep the Pan & Oven
- Preheat to 350 °F (175 °C).
- Lightly grease a mini muffin tin with cooking spray.
- Whisk Dry Ingredients
- In a bowl, sift together the flour and cocoa powder. Set aside.
- Blend Wet Base
- In a separate bowl, whisk the melted butter with the sugar, red coloring, vanilla, and eggs until smooth.
- Combine the Base
- Fold the flour mixture into the wet ingredients until just mixed—avoid overworking the batter.
- Prepare the Filling
- Beat the cream cheese on medium-high for about 1 minute until creamy.
- Add sugar and vanilla; whip another 1–1½ minutes.
- Stir in the egg yolk until the mixture is uniform with no yellow streaks.
- Assemble Bites
- Spoon roughly 1 tbsp of the red velvet batter into each muffin cup.
- Transfer the cheesecake filling to a piping bag (or zip-top bag with a corner snipped off).
- Pipe about 2 tsp of the cheesecake mixture into the center of each red velvet base.
- Bake & Cool
- Bake for 8–9 minutes, just until the edges set and centers are slightly jiggly.
- Let the bites rest in the pan for 20–30 minutes before gently popping them out.
- Finish cooling on a wire rack until fully set.
Notes
Tips & Storage
- Yield: Approximately 42 mini bites (using a 1 Tbsp scoop).
- Fridge: Keep leftovers airtight in the refrigerator for up to 5 days.
- Freezer: Flash-freeze on a tray, then store in a sealed container for up to 2 months; thaw overnight in the fridge.
- Pro Tricks:
- Always use room-temperature cream cheese for a silky filling.
- Create a tiny well in each red velvet cup with a greased ½ tsp measure to hold the cheesecake mixture perfectly.
- Lightly coat your scoop with nonstick spray to help portion the batter.
- Swap in Dutch-processed cocoa if you prefer.
- For a marbled look, drag a toothpick through the filling after piping.
- Oven temps vary—check at the lower end of baking time to avoid overbaking.
- Prep Time: 20 minutes
- Rest Time: 30 minutes
- Cook Time: 9 minutes
- Category: Desserts
Nutrition
- Calories: 93kcal
- Sugar: 7g
- Sodium: 46mg
- Fat: 6g
- Carbohydrates: 10g
- Fiber: 0.3g
- Protein: 1g
- Cholesterol: 27mg