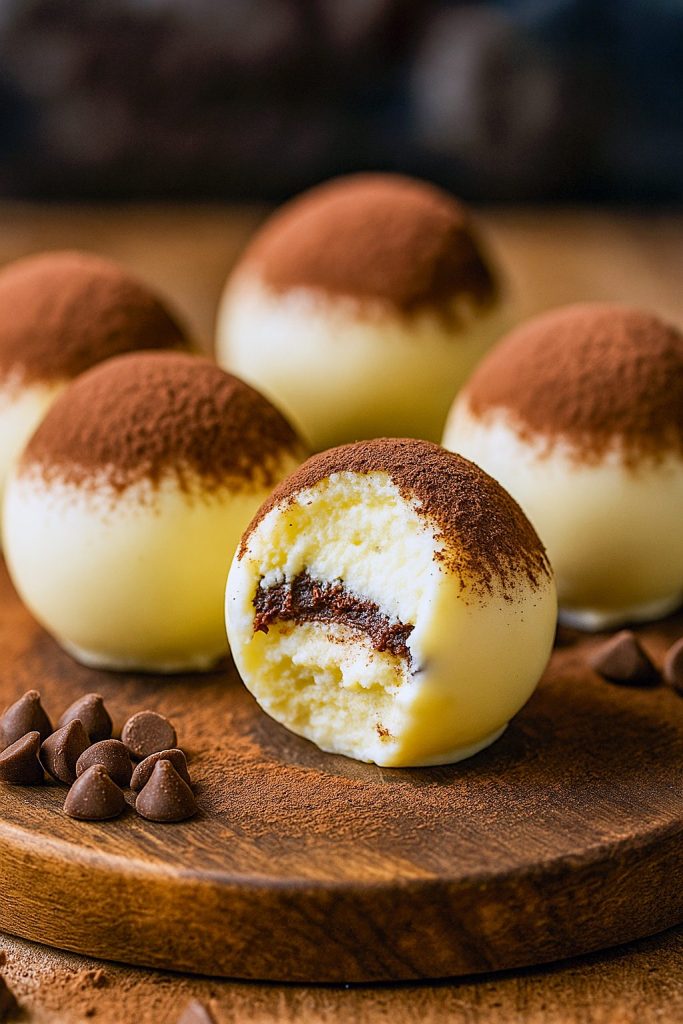
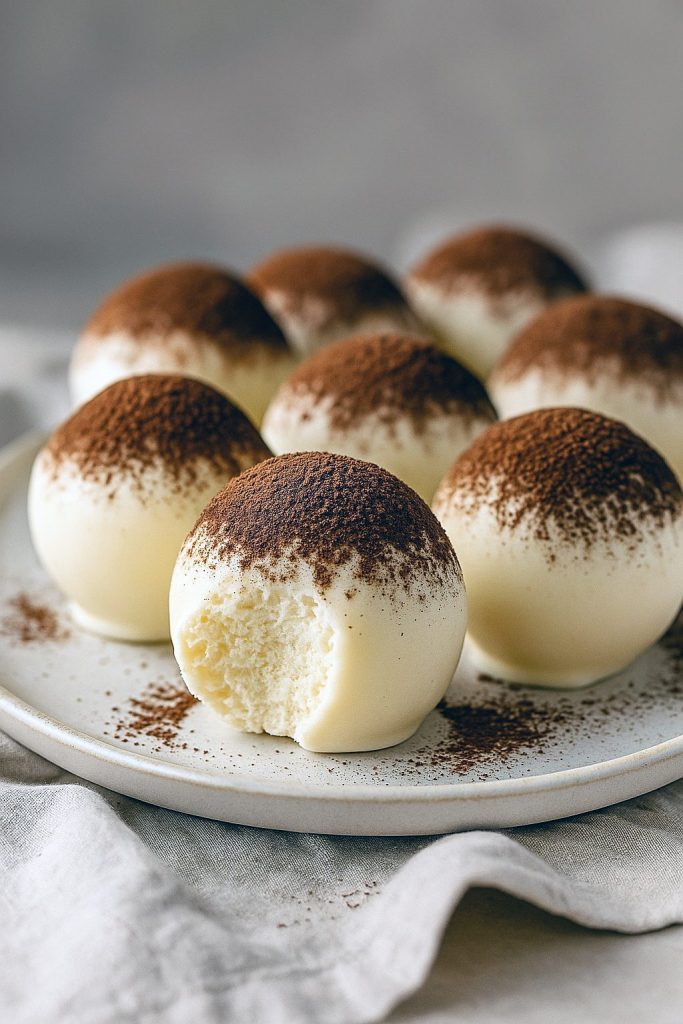
If you’ve ever wished tiramisu came in candy form… congratulations, your dessert dreams just came true. These Tiramisu Truffles are little bites of bliss—soft, creamy, coffee-kissed centers wrapped in a light cocoa dusting. They taste like dessert from a fancy Italian café but come together right in your kitchen. No baking. No drama. Just pure sweets treats magic.
So, what exactly are tiramisu truffles? Imagine all the rich, dreamy goodness of traditional tiramisu—mascarpone, espresso, ladyfingers, a touch of cocoa—rolled into an indulgent ball of joy. You get the best of both worlds: the elegance of a layered dessert and the poppable ease of candy desserts. It’s a total win for anyone who loves coffee, chocolate, and homemade candies.
Why You’ll Love These Tiramisu Truffles
Let’s be honest—life’s too short to skip dessert. And these truffles? They’re what happens when candy recipes homemade go next level. They’re:
- No-bake (perfect for hot days or lazy nights)
- Great for gifting or sharing (if you’re feeling generous)
- Customizable with your favorite flavors or toppings
- Ridiculously delicious
Whether you’re planning a dinner party, a cookie swap, or just a Netflix binge that calls for something sweet, these truffles have your back. They’re the ultimate easy truffles recipe.
What Makes Tiramisu Truffles So Good?
Good question. It comes down to three little words: texture, flavor, and simplicity.
The inside is super creamy—thanks to mascarpone cheese and whipped cream. Then you’ve got the texture boost from crushed ladyfingers, which give you just the right amount of crunch and hold. And don’t forget that bold shot of espresso flavor. That’s what sets these dessert truffles apart from all the others floating around Pinterest.
And the cocoa powder coating? Chef’s kiss. Not only does it make them look legit fancy, but it gives a subtle bitterness that balances out all that sweetness.
How It Comes Together
You only need a handful of ingredients and maybe 30 minutes of your time (plus chilling). That’s it. The steps are foolproof, and once you get the hang of rolling and dusting, you’ll feel like a truffle-making pro.
You’ll whip mascarpone with cream and sugar until it’s light and airy. Fold in some crushed ladyfingers and a splash of vanilla. Then comes the espresso (or coffee liqueur if you’re feeling a little wild). Roll it into balls, chill, dust with cocoa, and BAM—you’ve got yourself gourmet truffle recipe status.
Want to jazz them up? Try dipping them in melted chocolate for that shiny finish you see in professional chocolate candy recipes. Or roll them in crushed pistachios or cookie crumbs. You can even drizzle a little white chocolate on top if you’re going for Instagram-worthy.
Serving Tips + Fun Ideas
These beauties are perfect for holidays, showers, birthdays, or “I deserve this” days. Here are a few ways to serve ‘em:
- Stack them on a tiered tray like fancy pastries at a Paris café.
- Tuck a few into mini cupcake liners for an easy grab-and-go dessert.
- Pair them with espresso or dessert wine for a next-level dessert board.
FYI, they also make amazing edible gifts. Just pop a few into a cellophane bag, tie it with a ribbon, and boom—you’re the new favorite friend/neighbor/coworker.
Variations? Oh, You Bet.
Because you’re the boss of your truffles, you can totally customize these. Here are a few riffs on the original:
- Minty fresh: Add a couple drops of peppermint extract for a holiday spin.
- Nutty: Roll in chopped hazelnuts, almonds, or pecans.
- Boozy: Sub in rum, Kahlúa, or Bailey’s for a more grown-up vibe.
- Spiced: A dash of cinnamon or pumpkin spice brings fall vibes fast.
This is one of those candy recipes homemade that welcomes your creativity. Try a few combos and see what sticks—or, better yet, make a sampler tray!
How to Store Tiramisu Truffles
The best part? These keep really well in the fridge. Store them in an airtight container for up to 5 days. You can even freeze them for longer storage—just let them thaw in the fridge before serving.
Pro tip: If you’re making them ahead for a party or event, wait to dust with cocoa until right before serving. That way, they stay looking fresh and fancy.
Final Thoughts
So, whether you’re a hardcore tiramisu lover or just want something new to add to your eat dessert rotation, these tiramisu truffles are ready to steal the show. They’re chic enough for special occasions and simple enough for weeknight treats. And let’s be honest—yummy cookies and desserts that double as candy? Total game changer.
Ready to whip up your own batch of these elegant little treats? Trust me, once you taste that creamy center and cocoa-dusted finish, you’ll want to keep a stash on hand at all times. Don’t say I didn’t warn you.

Tiramisu Truffles – Your New Favorite Candy Dessert
- Total Time: 45 minutes
- Yield: 20 truffles
Description
These creamy, coffee-kissed Tiramisu Truffles are everything you love about the classic Italian dessert—rolled into indulgent little bites. With the smooth richness of mascarpone, a subtle espresso kick, and a melt-in-your-mouth texture, these no-bake gems are perfect for parties, gifting, or whenever you’re craving something sweet and elegant. Bonus: they’re ready in no time and don’t require turning on the oven!
Ingredients
- 1 ½ cups crushed ladyfingers (around 12–14 cookies, finely ground)
- ½ cup mascarpone cheese, softened to room temp
- ¼ cup powdered sugar
- 2 tablespoons strong brewed coffee or espresso, cooled
- 1 teaspoon pure vanilla extract
- ¼ teaspoon salt
- ½ cup melted semi-sweet or dark chocolate (optional for dipping)
- 2 tablespoons unsweetened cocoa powder (optional for dusting)
Instructions
- Mix It Up
- Grab a mixing bowl and toss in the ladyfinger crumbs, mascarpone, powdered sugar, coffee, vanilla, and salt. Stir everything together until it becomes a soft, thick dough. It should be smooth and just sticky enough to roll easily.
- Roll into Balls
- Scoop out small portions (about a tablespoon each) and roll them between your palms into 1-inch balls. Place the formed truffles onto a parchment-lined tray. If the mixture gets too soft while you work, pop it in the fridge for 10 minutes to firm up again.
- Chill Out
- Transfer the tray to the fridge and let the truffles rest for at least 30 minutes. This helps them firm up so they’re easier to coat.
- Time to Finish
- Once chilled, it’s coating time! You’ve got two delicious options:
- Dip: Dunk each truffle into the melted chocolate using a fork or candy dipper. Let any extra drip off, then place them back on the tray to set.
- Dust: Roll each truffle gently in cocoa powder for that classic tiramisu finish.
- Once chilled, it’s coating time! You’ve got two delicious options:
- Serve and Swoon
- Serve the truffles chilled for a firmer texture or let them come to room temperature for an extra creamy bite. Store leftovers in a sealed container in the refrigerator—they’ll stay fresh for up to 5 days (if they last that long!).
Notes
Tips & Twists
- Flavor Boost: Add 1–2 teaspoons of coffee liqueur like Kahlúa for an adults-only version.
- Textural Variety: Swap cocoa powder for crushed nuts, shredded coconut, or colorful sprinkles to mix things up.
- Smooth Operator: Use a food processor to grind the ladyfingers super fine for the silkiest texture.
- Make Ahead: These truffles can be prepped 2–3 days in advance. Just keep them chilled until you’re ready to serve.
- Prep Time: 15 minutes
- Chill Time: 30 minutes
- Category: Desserts