
Some desserts teleport you straight back to your childhood, right? For me, anything with chocolate and peanut butter sparks instant nostalgia. Enter the Easy Reeses Cake that doubles as the Reese Cup Dessert of your dreams—rich, gooey, and wildly indulgent. Seriously, this Earthquake Cake might just be the “ultimate dessert” (no joke).
I whipped this up after a Halloween candy avalanche. You know the scene: little orange-and-brown wrappers everywhere, and a rogue block of cream cheese in my fridge. One box of chocolate mix later, I had a cake that looked “bakery-worthy” but came together faster than you can say Easy To Make Chocolate Desserts.
Bold Tip: Let that cream cheese-peanut butter swirl shine. Don’t overmix—those gooey pockets are the best part.
Why You’ll Go Nuts Over It
- Perfect Harmony: Dense chocolate meets smooth peanut butter in every forkful.
- Swirly Magic: That tangy cream cheese frosting bakes right into the cake, creating tunnels of sweetness.
- Real Reese’s Cups: Chunks of peanut butter cups throughout make this a true Dessert Recipes Reeses masterpiece.
Can you resist a dessert that feels like a hug in a pan? IMO, it’s impossible.
Key Ingredients & Cheery Tips
- Chocolate Cake Mix: Devil’s food or classic—it all works.
- Cream Cheese & Peanut Butter: Beat until silky. Think Peanut Butter Sauce Dessert vibes here.
- Mini Peanut Butter Cups: Scatter halved cups so each slice gives you that iconic peanut-buttery crunch.
- Vanilla & Powdered Sugar: Don’t skip the splash of vanilla—it warms up the whole cake.
FYI: Softened cream cheese blends so much smoother—trust me on this one.
Step‐By‐Step Fun
- Preheat & Prep: Heat your oven to 350°F and grease a 9×13 pan. No one likes stuck-on disaster!
- Mix the Cake: Follow package directions, then smooth the batter into the pan. No fancy gadgets needed.
- Whip the Topping: Beat 8 oz. cream cheese, ½ cup butter, ½ cup peanut butter, and 1 tsp vanilla. Gradually add 2 cups powdered sugar until fluffy.
- Assemble: Dollop the frosting on the batter, swirl with a knife, then shower with chocolate chips and chopped Reese’s.
- Bake: Slide it in for 45–50 minutes. When a toothpick shows a few moist crumbs, you’re golden. Gooey bits are welcome here!
Perfect Occasions
- Baking For Party? This is your secret weapon—crowd-pleasing and effortless.
- Peanut Butter Birthday Dessert: Swap candles for whipped cream, and watch the celebration begin.
- Dump Cake Cupcakes? (Okay, that’s a different recipe, but you get the idea.)
Pro Tips & Variations
- For a Peanut Butter Blossom Cake twist, press a single Hershey’s Kiss into each slice right out of the oven.
- Craving texture? Sprinkle chopped peanuts on top before baking.
- Want to channel a classic Peanut Butter Sauce Dessert? Drizzle warmed peanut butter over each slice at serving time.
Serve & Savor
Let it cool just enough so the topping firms up, then slice into big, generous squares. Spoon warm pieces into bowls and crown with vanilla ice cream for a dessert that’s both sexy and nostalgic.
Is there anything better than scooping up a warm, chocolatey bite swirled with peanut butter? If you’re hunting for Ultimate Desserts, this cake eclipses almost everything else. And hey, if you somehow have leftovers (unlikely, thanks to its “too good” factor), wrap ’em up and stash in the fridge for up to four days.
So next time you need a show‑stopping treat—whether it’s Baking For Party or just a Wednesday-night craving—remember this Earthquake Cake. It’s Decadence. Simplified. Enjoy every gooey, peanut-butter-packed bite!
Ultimate Reese’s Earthquake Cake – Easy To Make Chocolate Desserts
- Total Time: 1 hour 10 minutes
- Yield: 12 slices
Description
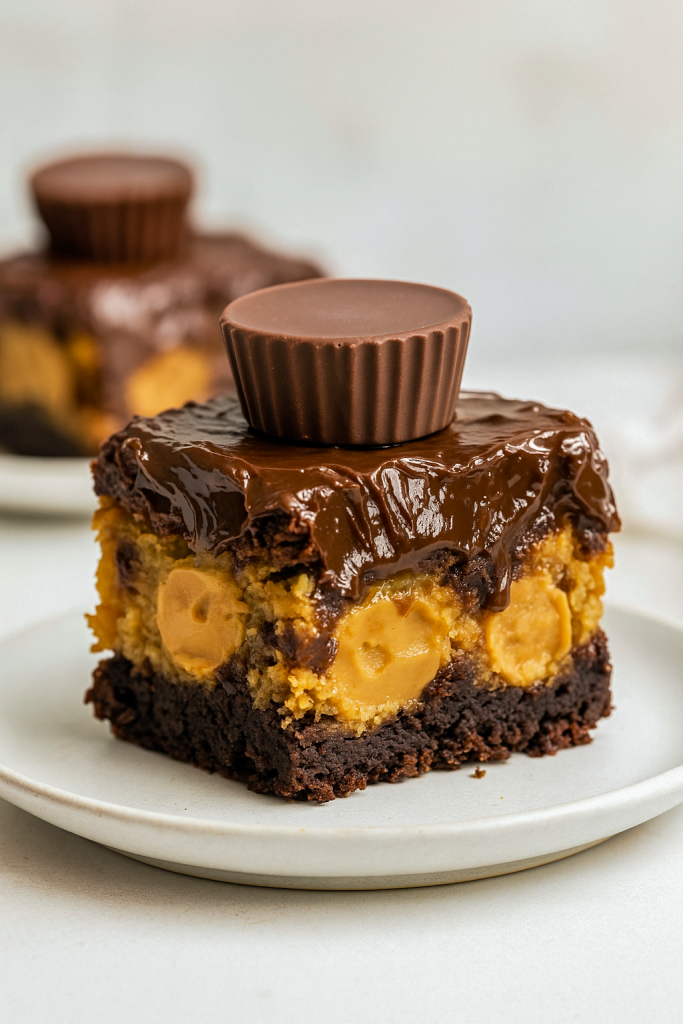
Get ready for a dessert that’s as fun to look at as it is to devour: layers of fudgy chocolate cake swirled with a dreamy peanut butter–cream cheese topping, studded with Reese’s cup pieces, and ideally enjoyed alongside a scoop of vanilla ice cream.
Ingredients
- Chocolate Cake Base
- 1 package dark chocolate fudge cake mix
- Peanut Butter Swirl Topping
- 8 oz cream cheese, at room temperature
- ½ cup unsalted butter, softened
- ½ cup smooth peanut butter
- 1 tsp vanilla extract
- 4 cups powdered sugar
- Mix‑Ins & Garnish
- ½ cup chocolate chips
- 1 cup mini Reese’s peanut butter cups, cut in half
- Vanilla ice cream, for serving
Instructions
-
Prep & Cake Batter
-
Heat your oven to 350 °F (175 °C).
-
Lightly grease a 9×13‑inch pan with nonstick spray or a thin film of butter.
-
In a mixing bowl, combine the cake mix with eggs, oil, and water as directed on the box. Whisk until no lumps remain, then pour into your prepared dish and smooth the top.
-
-
Whip the Peanut Butter Cream Cheese
-
In a separate bowl, beat together the cream cheese, butter, peanut butter, and vanilla until silky.
-
Gradually add the powdered sugar, a cup at a time, until the mixture is thick, spreadable, and holds its shape.
-
-
Layer & Add Candy
-
Dollop the peanut butter cream cheese mixture over the cake batter in spoonfuls. Use an offset spatula or knife to create swirls—think rivers of peanut butter weaving through chocolate.
-
Scatter the chocolate chips and halved Reese’s cups evenly on top, gently pressing them into the topping so they bake right in.
-
-
Bake to Perfection
-
Slide the pan into the oven for 45–50 minutes. Check at 40 minutes: when a toothpick inserted near the center comes out with just a few moist crumbs (not raw batter), it’s done. Resist the urge to overbake—gooey pockets are the goal!
-
-
Cool & Serve
-
Allow the cake to cool completely in the pan on a wire rack so the topping sets slightly.
-
Slice into squares and plate with a scoop of vanilla ice cream for a game‑changing warm‑and‑cold combo.
-
Notes
Storage Tips
- Refrigerate: Store any leftover pieces in an airtight container for up to 3 days.
- Reheat: Warm individual servings in the microwave for 10–15 seconds to revive that gooey goodness.
- Prep Time: 20 min
- Cook Time: 50 min
- Category: Desserts
Nutrition
- Calories: 450kcal